
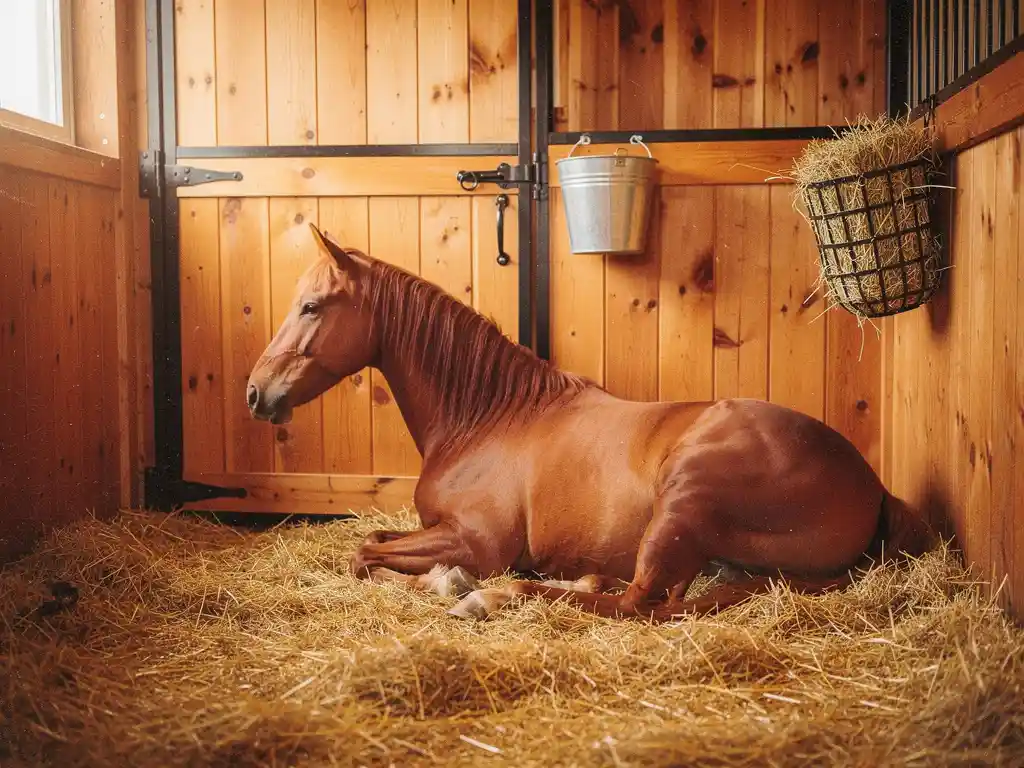
The lowest-maintenance horse stall setup combines rubber stall mats with minimal bedding and a consistent daily cleaning routine. Rubber mats protect the floor, reduce the amount of bedding you need, and make mucking out faster and easier. Pair that with good drainage, a simple feeding setup, and quality wall protection, and you will have a stall that practically takes care of itself.
What makes a horse stall setup truly low-maintenance?
A truly low-maintenance horse stall setup minimizes the time, labor, and materials you need to keep it clean, safe, and comfortable. The foundation is durable flooring, smart bedding management, and a layout that makes daily chores quick and straightforward.
The biggest time drain in most stalls comes down to three things: poor flooring that soaks up urine and bacteria, excessive bedding that takes forever to sort through, and awkward layouts that slow you down during cleaning. Fix those three things, and you can significantly cut your daily barn chores.
Good rubber stall mats are the single biggest upgrade you can make. They create a non-porous, cushioned surface that protects your horse’s joints, insulates against cold ground, and makes waste removal much quicker. Everything else, from bedding choice to cleaning frequency, builds on that foundation.
What type of flooring is easiest to clean in a horse stall?
Rubber matting is the easiest stall flooring to clean. It is non-porous, so it does not absorb urine or moisture. Waste sits on the surface rather than soaking in, which means you can remove it quickly and rinse the mat clean with water and a mild detergent when needed.
Bare concrete or compacted dirt floors are much harder to maintain. Dirt absorbs urine and harbors bacteria over time, creating persistent odors and hygiene problems. Concrete is hard on hooves and joints, and it can still hold moisture in its pores if it is not sealed. Both options require more bedding to compensate for their shortcomings, which adds cost and labor.
What to look for in a rubber stall mat
Not all rubber mats are equal. For horse stalls, you want mats that are thick enough to provide real cushioning, heavy enough to stay in place, and large enough to minimize gaps between pieces. Gaps between mats collect waste and bedding, which creates exactly the kind of mess you are trying to avoid.
A mat like the 4×6 Stall Mat, available in 3/4-inch and 5/8-inch thicknesses, gives your horse a comfortable surface to lie down on while insulating against cold and damp conditions. At around 91 to 115 pounds per mat, it stays put without needing adhesive. For stalls with unusual dimensions, made-to-measure options mean fewer seams and a cleaner, more hygienic fit overall.
How do rubber stall mats reduce daily barn chores?
Rubber stall mats reduce daily barn chores by cutting down the amount of bedding required and making waste removal faster. Because the mat surface does not absorb urine, wet spots stay concentrated in one area rather than spreading through the bedding layer. You remove less material each day, and the stall dries out more quickly after cleaning.
Without mats, urine soaks into the floor and the bedding around it, meaning you end up removing large, heavy wet patches every single day. With mats in place, you can spot-clean efficiently, pulling out only the soiled bedding and leaving dry material in place. Over a week, that adds up to a noticeable reduction in both time and bedding used.
There is also a structural benefit. Mats protect the floor underneath from repeated impact and moisture damage, which reduces the need for floor repairs over time. Horses that paw or dig at bare floors can cause significant damage quickly, and those repairs are both expensive and disruptive to your routine.
What bedding works best with rubber stall mats?
Shavings and pelleted bedding work best with rubber stall mats. Both materials are absorbent, easy to sort during mucking out, and work well in combination with a rubber mat base. You need less of either material compared to a bare-floor setup because the mat handles cushioning and insulation, leaving the bedding to focus purely on absorbing moisture.
Pelleted bedding, in particular, is worth considering if you are focused on keeping costs and labor down. It expands when wet, which means a small amount goes a long way. It also breaks down into a fine, manageable consistency that is easy to separate from dry material during cleaning.
Straw is a traditional choice but tends to require more volume to be effective and is harder to sort when wet. If you use straw, you will likely spend more time mucking out compared to shavings or pellets. Sand is sometimes used but can cause digestive issues if ingested and does not pair well with rubber mats from a hygiene standpoint.
How much bedding do you actually need?
With rubber mats in place, many horse owners find that a thin layer of three to four inches of shavings or a single bag of pelleted bedding per stall is enough. The mat provides cushioning and thermal insulation, so the bedding only needs to manage surface moisture. That reduction in bedding volume directly helps you reduce horse bedding costs over time without compromising your horse’s comfort.
How often should a low-maintenance horse stall be cleaned?
A low-maintenance horse stall should be mucked out at least once daily, with a quick check and spot-clean in the evening if your horse spends significant time in the stall. Daily cleaning prevents waste buildup, controls ammonia levels, and keeps the mat surface hygienic. A full deep clean of the mats themselves is useful once or twice a month.
The goal of a low-maintenance setup is not to clean less often, but to make each cleaning session faster. Daily mucking with rubber mats and efficient bedding takes a fraction of the time compared to managing a bare-floor stall. You are in and out more quickly, not skipping steps.
Ammonia from urine buildup is one of the biggest respiratory risks for stalled horses. Even if the stall looks clean, ammonia can accumulate in poorly managed bedding. Staying on top of daily spot-cleaning and ensuring good ventilation keeps ammonia levels low and reduces the risk of respiratory issues over time.
What are the most common mistakes that make stall upkeep harder?
The most common mistakes that make stall upkeep harder include using too much bedding, skipping daily cleaning sessions, choosing the wrong flooring, and ignoring gaps between mats. Each of these creates more work, not less, and turns a manageable routine into a time-consuming chore.
- Using too much bedding: More bedding means more material to sort through during mucking out. It also hides wet spots, which makes them harder to find and remove efficiently.
- Skipping days: Letting waste accumulate makes the next cleaning session significantly harder and increases ammonia exposure for your horse.
- Poor mat fit: Mats with large gaps between them collect waste and bedding in the crevices, creating areas that are difficult to clean and that harbor bacteria over time.
- No wall protection: Horses that kick walls can damage both the wall and themselves. Without stall wall guards, you end up dealing with repairs and injuries that add to your workload.
- Ignoring drainage: If water and urine have nowhere to go, they pool under mats and in corners. A stall with good drainage built into the floor or mat design stays cleaner with less effort.
Most of these mistakes are easy to fix with the right setup from the start. Investing in well-fitting mats, appropriate bedding depth, and proper accessories saves you time every single day going forward.
How do you set up a horse stall for long-term low maintenance?
To set up a horse stall for long-term low maintenance, start with quality rubber mats that cover the full floor area with minimal gaps, add a thin layer of absorbent bedding, protect your walls with rubber panels, and establish a consistent daily cleaning routine. Getting the setup right at the beginning means less corrective work later.
Here is a practical step-by-step approach:
- Cover the entire floor with rubber mats. Choose mats thick enough for cushioning and sized to minimize seams. For odd-shaped stalls, custom-cut mats eliminate the gaps that collect waste.
- Add minimal bedding on top. A few inches of shavings or pelleted bedding is enough when the mat handles insulation and cushioning. This is one of the most direct ways to reduce horse bedding costs over time.
- Install wall protection. Rubber wall guards in kick zones protect your horse’s legs and hooves and prevent wall damage that would otherwise require repairs.
- Check your drainage. Make sure the stall floor slopes slightly toward a drain or that your mat setup allows moisture to escape rather than pool.
- Stick to a daily routine. Muck out at the same time each day, top up bedding as needed, and do a deeper mat clean once or twice a month.
The rubber mats are the part of this setup that does the most heavy lifting. They protect the floor, reduce bedding use, cushion your horse’s joints, and make the daily clean a quicker job. Everything else supports that foundation.
If you are setting up a new stall or upgrading an existing one, we at LRP Matting offer custom-cut rubber mats sized to your exact stall dimensions. Fewer seams mean a cleaner, more hygienic surface and a setup that genuinely works for the long term. Get in touch with us to find the right solution for your barn.
Frequently Asked Questions
Can I install rubber stall mats myself, or do I need professional help?
Most horse owners can install rubber stall mats themselves without professional help. The process involves cleaning the existing floor thoroughly, laying the mats in a tight configuration starting from a corner, and ensuring the edges sit flush against the walls. The main challenge is handling the weight — mats can weigh 90 to 115 pounds each — so having a second person on hand makes the job much easier and safer.
How do I prevent urine from pooling under the rubber mats over time?
The best way to prevent urine from pooling under mats is to ensure the stall floor has a slight slope (around 1 to 2 percent) toward a drain or the stall entrance before laying the mats. Minimizing gaps between mats also helps, since urine finds its way through any openings. If you notice persistent moisture or odor underneath, lift the mats periodically for a deep clean of both the mat undersides and the floor surface below.
How long do rubber stall mats typically last, and how do I know when they need replacing?
High-quality rubber stall mats can last 10 to 20 years with proper care, making them one of the most cost-effective investments in your barn setup. Signs that a mat needs replacing include visible cracking, significant thinning from wear, permanent warping that creates gaps, or a surface that has become slippery and no longer provides adequate grip. Regular monthly cleaning and allowing mats to dry fully before replacing bedding will help maximize their lifespan.
What is the best way to control ammonia odor in a stall between daily cleanings?
Beyond daily mucking out, a few targeted strategies can keep ammonia under control between cleanings. Agricultural lime or a commercial stall deodorizer applied sparingly to the mat surface before laying fresh bedding helps neutralize odor-causing bacteria. Good ventilation is equally important — ensure your stall has adequate airflow through windows, vents, or open barn aisles, since stagnant air allows ammonia to concentrate quickly even in a well-managed stall.
Do rubber stall mats work well for horses that tend to paw or dig constantly?
Yes, rubber stall mats are actually one of the best solutions for horses that paw or dig, since they protect the floor underneath from the damage that would otherwise accumulate quickly on bare dirt or concrete. Heavy mats in the 3/4-inch thickness range are the better choice for chronic pawers, as they are harder to shift and provide a more durable surface. If your horse manages to move mats despite their weight, interlocking edge designs or mats cut precisely to the stall dimensions can help keep everything firmly in place.
Is there anything I should put between the rubber mats and the concrete floor underneath?
In most cases, rubber mats can be laid directly onto a clean, level concrete floor without any additional layer in between. However, if your concrete floor is uneven or has low spots, a thin layer of compacted stone dust or sand can be used to level the surface before mat installation. Avoid placing any moisture-trapping material like foam or carpet padding underneath, as these can hold urine and create hygiene and odor problems that are difficult to resolve without removing the mats entirely.
Can the same low-maintenance stall setup work for miniature horses or ponies, or does it need to be adapted?
The same core principles apply — rubber mats, minimal absorbent bedding, wall protection, and a daily cleaning routine — but the scale adjusts accordingly. Smaller equines require less bedding volume and may do well with thinner mat options since their body weight puts less stress on the surface. The most important adaptation is ensuring mat thickness and bedding depth still provide adequate cushioning relative to the animal's size, as smaller horses and ponies are just as prone to joint stress from hard surfaces as full-sized horses.
Related Articles
- How do you build a floor maintenance plan?
- How do you prevent seasonal floor hazards?
- What is the best rubber mat thickness for a horse stall?
- How do you choose flooring for a multi-sport facility?
- What makes a floor surface safe for a horse coming out of anesthesia?
- How do you reduce re-injury risk in a horse recovery stall?
- How do you protect a newly installed floor in a busy facility?
- How do you insulate a horse stall floor in winter?
- How do you keep a sports facility floor safe in wet conditions?
- Is concrete a good floor for a horse stall?