
To level a horse stall floor before laying mats, start by clearing the stall completely and assessing the floor with a long straightedge or level. Fill low spots with compacted sand, stone dust, or a concrete patching compound, depending on your subfloor type. Allow any patching material to cure fully, then confirm the surface is flat, firm, and dry before placing your mats. A properly leveled floor takes less than a day of prep work but makes a significant difference in how well your mats perform and how long they last.
Why does a level horse stall floor matter before laying mats?
A level horse stall floor matters because uneven surfaces create gaps under rubber mats, causing them to rock, shift, and wear unevenly. This movement puts stress on both the mat and the horse, increasing the risk of slips and joint strain. A flat, stable base lets the mat do its job properly—absorbing impact, providing traction, and staying firmly in place.
When a mat rocks or flexes repeatedly, it degrades faster than it should. The edges curl, the seams between mats widen, and bedding works its way underneath. Over time, moisture and waste collect in those gaps, creating hygiene problems that are difficult to address without pulling up the entire floor. Taking the time to level the floor before installation prevents all of that.
There is also a comfort angle worth considering. Horses spend a significant portion of their day standing and lying down in their stalls. A floor with bumps and dips transfers that unevenness directly to the horse’s hooves, legs, and joints. A flat, well-supported mat surface keeps the horse comfortable and reduces the physical stress that accumulates over months and years.
What type of subfloor works best under horse stall mats?
Concrete is the most popular subfloor for horse stall mats because it is firm, easy to level, and does not shift over time. Compacted stone dust or road base is a strong second choice, offering good drainage and a stable surface that can be re-leveled if needed. Dirt floors are workable but require the most preparation to achieve a firm, even base.
Concrete subfloors
Concrete gives you a permanent, consistent foundation. It does not compress under the weight of a horse, so your mats stay flat and supported for years. The main drawback is that concrete can be cold and hard if a mat ever shifts out of place, which is why proper leveling and mat selection matter so much on this surface.
Compacted aggregate subfloors
Stone dust and road base are popular in barn construction because they drain well and are forgiving to work with. You can add or remove material to adjust the level without specialized tools. The key is compaction—a loose aggregate base will settle unevenly under the weight of a horse, so always compact thoroughly before laying mats.
Dirt subfloors
Bare dirt floors are the most challenging base for rubber mats. Dirt shifts, compresses, and erodes, especially in high-traffic areas near the stall entrance. If you are working with a dirt floor, pack it as firmly as possible, add a layer of compacted stone dust or gravel for stability, and plan on checking the level periodically throughout the year.
How do you assess how uneven a horse stall floor is?
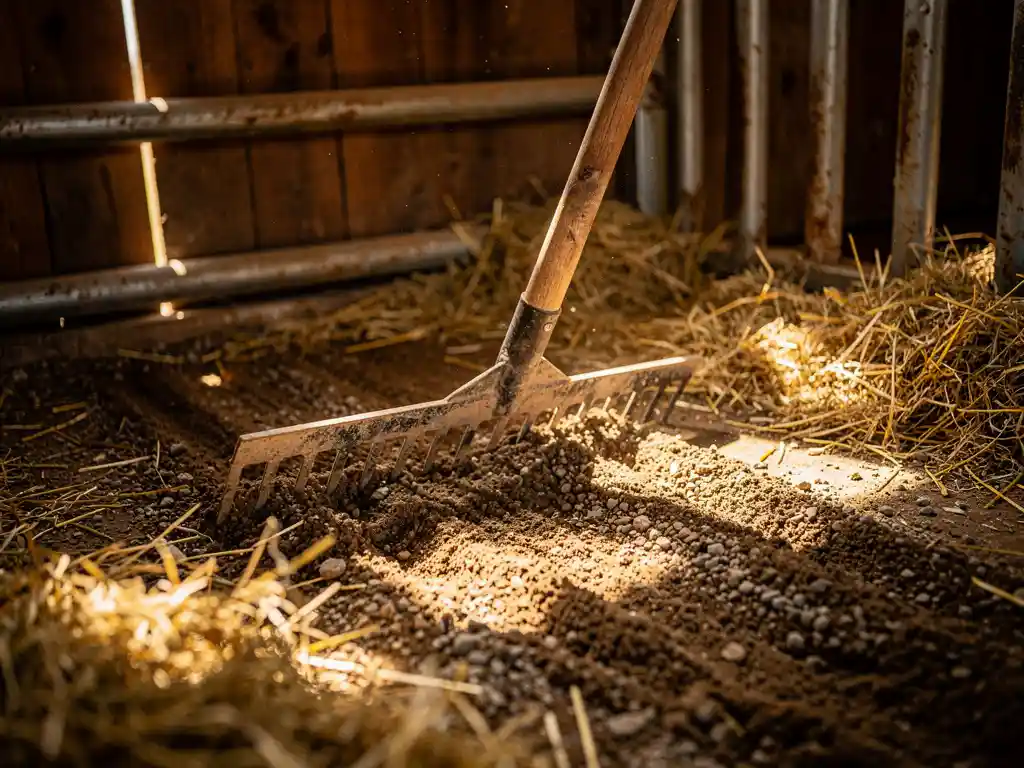
To assess unevenness in a horse stall floor, use a long straightedge or a four-foot level and drag it slowly across the entire floor surface. Anywhere the straightedge rocks or light shows beneath it is a low or high spot that needs attention. Mark problem areas with chalk so you have a clear map before you start any repair work.
Start at the stall entrance, since this area typically gets the most traffic and shows the most wear. Work your way toward the back wall in overlapping passes, both lengthwise and across the width of the stall. This cross-checking approach catches depressions that run in one direction but might be missed if you only sweep the level one way.
Pay close attention to the corners and along the walls. Horses tend to stand in the same spots repeatedly, and those areas often develop low spots over time. On concrete floors, look for cracks, spalling, or chunks that have broken away—these need patching before you lay any mats. On aggregate floors, probe the surface with a rod or screwdriver to check for soft spots that feel solid on top but are loose underneath.
How do you level a horse stall floor step by step?
Leveling a horse stall floor involves clearing the space, identifying high and low spots, filling depressions with the right material, compacting everything firmly, and confirming the result with a level before laying any mats. The specific materials you use depend on your subfloor type, but the overall process is straightforward and manageable with basic tools.
- Clear the stall completely. Remove all bedding, mats, and loose debris. You need a clean, bare surface to work from.
- Sweep and clean the floor. Dust, manure residue, and loose material will interfere with patching compounds and your ability to read the surface accurately.
- Mark all uneven areas. Use your straightedge and chalk to identify every high point, low spot, and crack. Do not skip this step—it saves time later.
- Address high spots first. On concrete, grind down raised edges or ridges with an angle grinder. On aggregate, rake and remove excess material before compacting.
- Fill low spots. On concrete, use a self-leveling concrete compound or a hydraulic cement patching mix. On aggregate, add stone dust or compacted gravel in thin layers, compacting each layer before adding the next.
- Allow patching material to cure. Follow the manufacturer’s instructions for curing time. Rushing this step leads to soft patches that compress under the mat.
- Compact the surface. On aggregate floors, use a hand tamper or plate compactor to consolidate the entire surface, not just the patched areas.
- Confirm levelness. Run your straightedge across the floor again in multiple directions. You are aiming for no gaps greater than a quarter inch anywhere on the surface.
- Let the floor dry completely. Moisture trapped under a rubber mat creates an ideal environment for bacteria and mold. Make sure the floor is fully dry before installation.
What mistakes should you avoid when preparing a stall floor for mats?
The most common mistakes when preparing a horse stall floor for mats are rushing the leveling process, skipping proper compaction, and laying mats on a damp surface. Each of these shortcuts leads to problems that are harder and more expensive to fix after the mats are already down.
Using the wrong fill material is another frequent issue. Not all patching compounds bond well to existing concrete, and some aggregate materials settle too quickly under heavy loads. Always match your fill material to your subfloor type and confirm it is rated for the load it will carry.
Ignoring drainage is a mistake that shows up over time rather than immediately. If your stall floor does not slope slightly toward a drain or toward the stall entrance, liquids will pool under the mats and create hygiene and odor problems. A gentle slope of around one percent is enough to keep moisture moving in the right direction without making the floor feel noticeably tilted under the horse.
Finally, do not underestimate the size of the area you need to level. Even a stall that looks flat to the eye often has surprising variation when you check it with a level. Taking a thorough, systematic approach to assessment before you start patching saves you from discovering missed spots only after the mats are in place.
How thick should rubber mats be for a horse stall floor?
Rubber mats for horse stalls should generally be at least three-quarters of an inch thick. This thickness provides enough cushioning to protect the horse’s joints, enough weight to stay in place, and enough rigidity to bridge minor surface imperfections in the floor beneath. Thinner mats can work in low-traffic areas but tend to shift more and wear faster under regular use.
For stalls where horses spend long periods standing or lying down, a three-quarter-inch mat offers a meaningful improvement in comfort compared to thinner options. The added thickness also provides better thermal insulation, keeping the floor warmer in cold weather and reducing the amount of bedding needed to keep the horse comfortable.
Heavier horses and high-traffic stalls benefit from thicker mats in the range of five-eighths to three-quarters of an inch. The extra material absorbs more impact and holds up longer under repeated loading. In areas like wash bays or trailer ramps, where the surface conditions are different, the thickness requirements may vary depending on the specific application.
How do you install rubber mats on a leveled horse stall floor?
To install rubber mats on a leveled horse stall floor, start by measuring the stall carefully and planning your mat layout before moving any material into the space. Place the first mat in a corner, work outward toward the entrance, and fit each mat snugly against its neighbor to minimize gaps. On a properly leveled floor, the mats should lie flat immediately without rocking or bridging.
Before you carry any mats in, double-check your measurements and consider the direction of the seams. Positioning seams away from high-traffic zones, like the area directly in front of the water bucket or feeder, reduces wear at the edges and keeps the floor looking tidy for longer. If your stall has an unusual shape or non-standard dimensions, our custom rubber matting solutions can be cut to your exact specifications, which eliminates awkward gaps and reduces the number of seams in the finished floor.
Heavier mats stay in place more reliably than lighter ones, but even a well-chosen mat can migrate over time if the floor beneath it is not completely flat and dry. Once all the mats are positioned, check each one by pressing down on the corners and edges. Any rocking or flexing at this stage is a sign that the floor beneath still needs attention before you call the job done.
Add bedding only after all mats are confirmed flat and stable. Starting with a thinner layer of bedding than usual is a good idea for the first few days—it lets you spot any mat movement early, before it becomes a problem. Once you are confident the floor is performing well, you can adjust your bedding routine to match your normal practice.
Frequently Asked Questions
How often should I re-check and re-level my horse stall floor after mats are installed?
It is a good idea to lift and inspect your stall mats at least once or twice a year, ideally at the change of seasons. Aggregate and dirt subfloors in particular can shift, settle, or erode over time, especially in high-traffic areas or after a wet winter. If you notice mats starting to rock, develop gaps at the seams, or feel uneven underfoot, that is a sign it is time to pull them up and re-assess the surface beneath.
Can I use self-leveling concrete compound on an aggregate or dirt subfloor?
Self-leveling concrete compound is designed for use over existing concrete or similarly rigid surfaces—it is not suitable for aggregate or dirt subfloors, which lack the structural rigidity needed to support it. On those surfaces, stick with compacted stone dust, road base, or crushed gravel added in thin, well-compacted layers. Using the wrong material on the wrong subfloor type can result in cracking, crumbling, or uneven settling that is worse than the original problem.
What is the best way to handle a stall floor that has a significant slope or drainage issue?
A gentle slope of around one percent toward a drain or the stall entrance is actually desirable for moisture management, but anything steeper than that can cause discomfort and joint stress for the horse. If your floor has an excessive or uneven slope, build it up with compacted aggregate on the low side to create a more consistent grade rather than trying to flatten it completely. Always confirm that your finished surface still allows liquids to drain rather than pool, since standing moisture under mats is one of the most common causes of hygiene and odor problems.
Do I need to use adhesive or fasteners to keep rubber mats in place on a leveled floor?
In most horse stall applications, adhesive is not recommended because it makes future mat removal for cleaning or re-leveling extremely difficult. The weight of quality three-quarter-inch rubber mats, combined with a flat, dry, well-prepared subfloor, is usually sufficient to keep them firmly in place. If you are finding that mats shift despite a level surface, the more likely culprits are residual moisture on the subfloor, mats that are too thin for the application, or minor surface irregularities that still need addressing.
How do I level a stall floor in an existing barn without removing the entire old concrete slab?
You do not need to remove the existing slab in most cases—surface preparation and patching are enough to correct typical wear patterns. Use an angle grinder to knock down raised ridges or spalled edges, then apply a concrete patching compound or self-leveling underlayment to fill depressions and cracks. As long as the existing slab is structurally sound and not actively crumbling, this approach is far more practical and cost-effective than a full replacement.
Is it worth leveling the floor if I am only using mats temporarily or for a short-term boarding situation?
Even for temporary setups, basic leveling is worth the effort because an uneven floor creates safety risks for the horse regardless of how long the mats are in place. At a minimum, identify and fill any significant low spots or raised edges that could cause a mat to rock or a horse to stumble. A quick pass with a straightedge and a bag of patching compound takes very little time and makes a meaningful difference in both mat performance and horse safety, even over a short period.
What tools do I actually need to level a horse stall floor, and are any of them worth renting?
For most stalls, you can get by with a four-foot level or long straightedge, a stiff-bristle broom, chalk for marking, and a hand tamper for compacting aggregate. If you are dealing with a larger barn with multiple stalls or a significantly uneven aggregate floor, renting a plate compactor for a day is well worth the cost—it achieves a much more thorough and consistent compaction than a hand tamper alone. For concrete work, an angle grinder with a grinding disc is helpful for high spots and is also widely available at equipment rental shops.
Related Articles
- What flooring works best under heavy sports equipment?
- How does the type of stall floor affect how much bedding you need?
- What is the best flooring for a sports facility?
- What is the best flooring for a horse trailer?
- What do you put on a horse trailer ramp to prevent slipping?
- What makes a floor surface safe for a horse coming out of anesthesia?
- How do you know if your factory floor is causing worker fatigue?
- What type of flooring is best for a horse recovery stall?
- What is the best flooring for a horse stable grooming area?
- How do you reduce leg strain in a horse that spends a lot of time in a stall?