

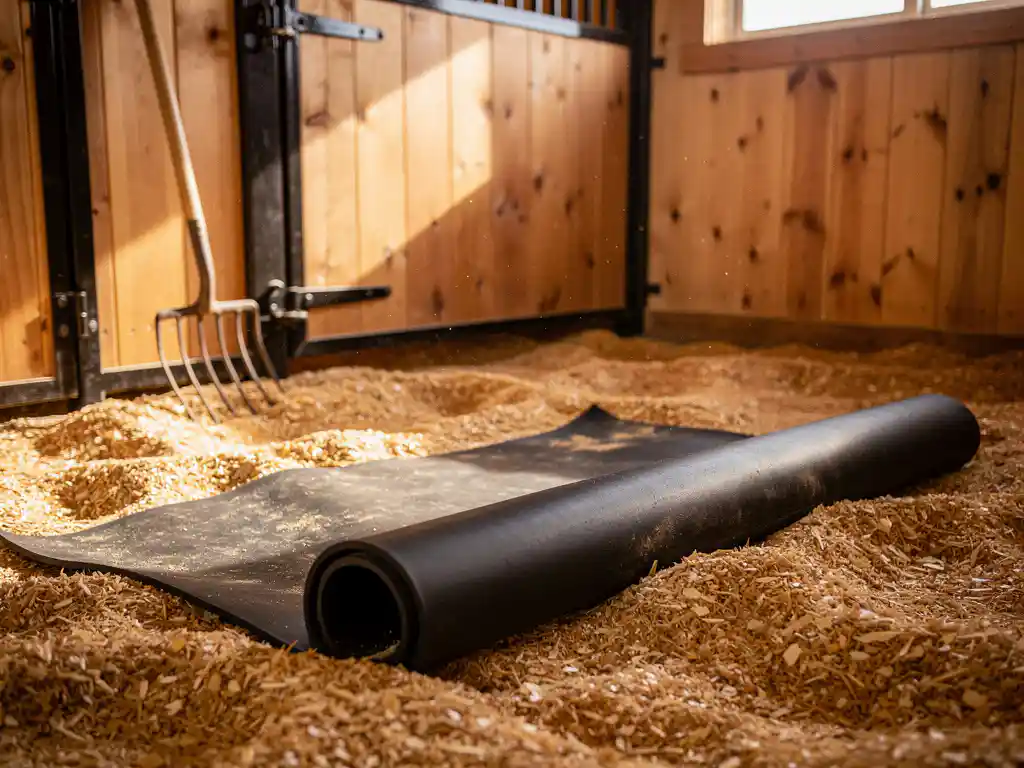
Setting up a new horse stall from scratch involves choosing the right size, sourcing durable materials, installing proper flooring, and ensuring that ventilation and drainage are in order. A standard horse stall is 12 x 12 feet, built with pressure-treated lumber or steel framing, rubber mat flooring over compacted stone or concrete, and at least 6 inches of bedding on top. You will also need good airflow, a drainage slope, and a few key accessories to keep your horse comfortable and safe.
What size should a horse stall be?
A standard horse stall should be at least 12 x 12 feet for most full-sized horses. This gives your horse enough room to lie down, turn around, and move without feeling confined. For larger breeds, such as warmbloods or draft horses, a 12 x 14—or even 14 x 14—foot stall is a better fit.
Size really does matter when it comes to your horse’s well-being. A stall that is too small can cause stress, restrict natural movement, and increase the risk of injury. As a general rule, the stall should be large enough for the horse to lie flat without its legs touching the walls. If you are housing a mare with a foal, increase that to at least 14 x 14 feet to give both animals adequate space.
What materials do you need to build a horse stall?
To build a horse stall from scratch, you will need framing lumber or steel posts, wall panels or kickboards, stall doors with secure latches, roofing materials, and flooring components. Most builders use pressure-treated 2×6 or 2×8 lumber for the frame, with hardwood or composite panels for the lower walls, where kick resistance matters most.
Here is a practical list of the core materials you will need:
- Pressure-treated lumber or galvanized steel for the frame
- Hardwood or heavy-duty composite panels for the lower kick walls (at least 4 to 5 feet high)
- Stall grilles or bars for the upper portion to allow airflow and visibility
- A solid sliding or swinging stall door with a horse-proof latch
- Gravel or crushed stone for the sub-base
- Rubber matting for the finished floor
- Fasteners, hinges, and hardware rated for barn use
When choosing wall materials, prioritize durability and safety over cost. Horses kick, lean, and chew, so materials need to hold up to serious daily wear. Smooth, splinter-free surfaces are important to help prevent injuries to legs and hooves.
What is the best flooring for a horse stall?
Rubber matting over a compacted gravel or concrete base is widely considered the best flooring for a horse stall. It provides cushioning for joints, insulation against cold ground, and a non-slip surface that reduces the risk of injury. Rubber mats are also non-porous, so they do not absorb urine or moisture the way bare dirt or wood can.
Concrete alone is too hard and unforgiving for long-term use. Dirt floors drain well but are difficult to keep clean and can become uneven over time. Rubber matting gives you the best of both worlds: a stable, firm base with enough give to protect your horse’s legs, hooves, and joints while standing and lying down.
What to look for in a horse stall mat
Not all rubber mats are created equal. For horse stalls, look for mats that are at least 3/4 inch thick, made from genuine rubber (not recycled crumb-rubber blends that can crumble over time), and heavy enough to stay in place without shifting. A textured or studded top surface adds grip, which is particularly useful when the floor gets wet.
Thickness options like 3/4 inch or 5/8 inch can both work well, depending on your budget and the weight of your horse. Heavier mats tend to stay put better and provide more insulation, which is a real bonus in colder climates.
How do you install rubber mats in a horse stall?
Installing rubber mats in a horse stall is a straightforward process. Start with a clean, level base, lay the mats tightly against each other to minimize gaps, and trim any edges as needed to fit the stall dimensions. Most standard 4 x 6 foot stall mats require about six to eight mats to cover a 12 x 12 foot stall.
Follow these steps for a clean installation:
- Prepare the sub-base by compacting gravel or ensuring the concrete is level and clean
- Start laying mats from one corner and work outward
- Push each mat snugly against the previous one to close any gaps
- Trim mats along walls using a utility knife or a circular saw with a rubber-cutting blade
- Check that no edges are raised or curling, as these can be tripping hazards
One practical tip: fewer seams mean a cleaner, safer floor. Larger mats reduce the number of joints where urine and debris can collect. If your stall has an unusual shape or non-standard dimensions, made-to-measure mats cut to your exact specifications can simplify installation significantly and give you a much neater finish.
How much bedding does a horse stall need?
A horse stall needs a minimum of 6 inches of bedding on top of the floor surface, whether that is straw, shavings, or pelleted bedding. This depth provides enough cushioning for lying down and absorbs urine effectively. Some horse owners prefer 8 to 10 inches for added comfort, especially for older horses or those recovering from injury.
The type of bedding you choose affects how much you need and how often you replace it. Straw is traditional, and horses often eat it, which can reduce the effective depth quickly. Wood shavings are popular because they absorb moisture well and are easy to muck out. Pelleted bedding expands significantly when wet, so a smaller starting volume goes a long way.
How rubber mats help reduce horse bedding costs
One of the most practical benefits of rubber stall mats is that they can help reduce horse bedding costs. Because the rubber surface is non-porous and easy to clean, urine does not soak into the floor itself. This means you can use less bedding overall, since you are not trying to compensate for an absorbent or uneven base. Many horse owners report needing significantly less bedding after switching to rubber mats, which adds up to real savings over time. If reducing horse bedding costs is a priority for you, quality rubber flooring is one of the most effective first steps you can take.
What ventilation and drainage does a horse stall require?
A horse stall requires good cross-ventilation to remove ammonia from urine, moisture, and airborne dust, along with a floor slope of around 1 to 2 percent toward a drain or the stall doorway to manage liquid runoff. Without both, you end up with a damp, smelly stall that is harmful to your horse’s respiratory health and hooves.
For ventilation, stall grilles or bars above the kickboards allow air to circulate between stalls. Ridge vents, open eaves, or barn fans help move fresh air through the whole barn. Avoid sealing a barn too tightly in winter in an attempt to keep it warm. Horses generate a lot of body heat, and poor airflow is far more damaging than cool temperatures.
For drainage, a slight slope in the sub-base before you lay your rubber mats is the most effective solution. Some rubber mats also feature drainage channels or perforations that help liquid move away from the surface rather than pooling under the mat. Ring mats with drainage holes are a good option for wash areas adjacent to stalls.
What are the most common mistakes when setting up a horse stall?
The most common mistakes when setting up a horse stall are building it too small, skipping proper drainage, using flooring that is too hard or too slippery, and underestimating ventilation needs. These issues might not seem serious at first, but they can lead to health problems, injuries, and higher maintenance costs down the line.
Here are the mistakes worth avoiding from the start:
- Building too small: A cramped stall causes stress and limits natural movement. Always err on the side of more space.
- Skipping the sub-base: Laying rubber mats directly on uneven dirt leads to shifting, gaps, and pooling. A compacted gravel base makes all the difference.
- Using the wrong flooring: Bare concrete is too hard and too slippery when wet. Rubber matting is a far safer and more comfortable surface.
- Ignoring drainage: A flat floor with no slope traps urine and moisture, leading to hoof rot and ammonia buildup.
- Poor ventilation: Sealed or poorly ventilated barns can cause respiratory issues. Fresh air circulation is non-negotiable.
- Weak or unsafe hardware: Horses are strong and curious. Use heavy-duty latches, hinges, and fasteners rated for equine use.
Getting the foundation right saves you a lot of rework later. If you are starting from scratch, it is worth taking the time to plan each element carefully before you start building.
If you want to get the flooring right the first time, we at LRP Matting are here to help. We have been manufacturing high-quality rubber stall mats since 1971, and our products are built to last in exactly the kind of demanding environment a horse stall presents. Whether you need standard 4 x 6 stall mats or a custom rubber mat solution sized to fit your exact stall dimensions, we can help you find the right fit for your setup.
Frequently Asked Questions
How long does it typically take to build a horse stall from scratch?
The timeline depends on your experience level, the complexity of the build, and whether you are working alone or with help. A basic single stall with a prepared sub-base can realistically be framed, floored, and fitted in a long weekend for an experienced builder, while a first-time project may take one to two weeks. Having all your materials on-site before you start and a clear plan for each phase — foundation, framing, flooring, and hardware — will keep the project moving without costly delays.
Can I convert an existing barn space or shed into a horse stall?
Yes, converting an existing structure is often more cost-effective than building from scratch, but you need to assess a few critical factors first: ceiling height (a minimum of 9 to 10 feet is recommended), structural integrity of the walls, and whether the existing floor and drainage can be modified to meet equine standards. Pay particular attention to any exposed nails, splinters, or low beams that could injure a horse. In many cases, adding rubber matting, proper kickboards, and upgraded ventilation is enough to bring an existing space up to a safe and functional standard.
How often should horse stall rubber mats be cleaned and replaced?
Rubber stall mats should be swept or scraped daily as part of your regular mucking routine and lifted and thoroughly cleaned underneath at least every few months to prevent ammonia buildup and moisture accumulation beneath the surface. High-quality solid rubber mats can last 10 to 20 years or more with proper care, so replacement is rarely needed if you invest in a durable product from the start. Signs that mats need replacing include crumbling edges, deep cracking, or significant thinning that reduces cushioning.
What accessories are essential to have in a horse stall before moving a horse in?
Before your horse moves in, you should have a securely mounted water source (automatic waterer or a fixed bucket holder), a hay rack or net positioned at an appropriate height, and a feed bucket or manger. A salt or mineral block holder is also recommended. Make sure all hardware — latches, hinges, and any wall-mounted fixtures — is fully installed and tested for security before the horse enters, as horses will quickly find and exploit anything loose or poorly fastened.
Is it safe to use reclaimed or secondhand lumber to build a horse stall?
Reclaimed lumber can be used, but it requires careful inspection before you commit to it. Avoid any wood that has been treated with older preservatives such as CCA (chromated copper arsenate), which is toxic to horses, and check thoroughly for protruding nails, staples, or splinters that could cause injury. Structurally sound, splinter-free reclaimed hardwood can work well for kickboards and paneling, but for the primary frame, new pressure-treated lumber rated for ground contact is a safer and more reliable choice.
How do I manage manure and waste removal from a horse stall efficiently?
The most efficient approach is a consistent daily mucking routine: remove soiled bedding and manure each morning, spot-check again in the evening, and keep a designated manure storage area at least 50 feet from the barn to reduce flies and odor. A well-designed stall with proper drainage and rubber matting makes this process significantly faster, since urine does not soak into the floor and soiled areas are easier to identify and remove. A good-quality manure fork sized to your bedding type — finer tines for shavings, wider for straw — will also make the daily task quicker and less physically demanding.
What is the best way to horse-proof a stall door and prevent escape?
Use a sliding or swinging door fitted with at least two horse-proof latches — one at chest height and one at the bottom — since horses are surprisingly adept at nudging open single-latch doors. Bolt snaps and simple hook-and-eye latches are not sufficient on their own; look for purpose-built equine stall latches that require a deliberate two-step action to open. For horses that are persistent escape artists, a secondary chain or cotter-pin latch adds an extra layer of security without compromising your ability to exit quickly in an emergency.
Related Articles
- How can preventative maintenance reduce unexpected floor repairs?
- What makes a sports surface safe?
- How do entrances create floor safety risks?
- How often should commercial floors be maintained?
- How do you protect a sports facility floor from moisture and heavy use?
- How do large equestrian facilities keep stall maintenance costs down?
- What is the best flooring for an equine breeding facility?
- What is the difference between anti-fatigue mats and standard rubber mats?
- How do you keep a sports facility floor safe in wet conditions?
- What flooring works best in an outdoor or covered sports venue?